 |
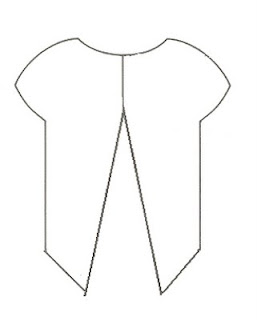
| The Schematic |
Knitted
in bands are created by working a series of stitches at the edge, of the
garment in a different stitch pattern, than the rest of the garment. This type
of edging is common, as it is simple to execute. It also has the advantage of
being worked as a continuation of the bottom border.
Its main drawback can be the differing gauge between the main stitch pattern and the edge stitch pattern. In garter stitch, it often creates a longer front edge that hangs down below the hem of the rest of the garment. Often this problem does not show up on a swatch due to its small size but shows up on the garment once gravity begins to act on the fabric.
To compensate, work a slip stitch edge, short rows or use a short set of smaller size double pointed needles just for the border stitches.
A slipped edge stitch is easy to do, slip the first stitch of every row purl wise. It creates an edge that looks like a chain. It reduces the edge stitches by 50% which can be too much for tight knitters and can draw the edges up to be too short instead of too long.
Short rows are the most complicated solution which requires the most planning and tracking to execute. I don't normally recommend this solution due to its complexity.
To execute the last fix, short wooden or bamboo needles work particularly well as they don’t slip out of the work as easily. An alternative method is to work with a set of interchangeable circulars, swapping the needle tips for the edge only. A third method uses two circular needles, one short and one long. Using different types or different colours of needles means they are less likely to be mixed up. Three needles are required for seamless garments.
Swatching will help determine the best solution for the project. As always, an individual knitter's technique and yarn choice has an impact in determining the best possible solution.
Parts 1, 3, 4 and 5 are here.
Part 1
Part 3
Part 4
Part 5
Its main drawback can be the differing gauge between the main stitch pattern and the edge stitch pattern. In garter stitch, it often creates a longer front edge that hangs down below the hem of the rest of the garment. Often this problem does not show up on a swatch due to its small size but shows up on the garment once gravity begins to act on the fabric.
 |
| The Sweater |
To compensate, work a slip stitch edge, short rows or use a short set of smaller size double pointed needles just for the border stitches.
A slipped edge stitch is easy to do, slip the first stitch of every row purl wise. It creates an edge that looks like a chain. It reduces the edge stitches by 50% which can be too much for tight knitters and can draw the edges up to be too short instead of too long.
Short rows are the most complicated solution which requires the most planning and tracking to execute. I don't normally recommend this solution due to its complexity.
To execute the last fix, short wooden or bamboo needles work particularly well as they don’t slip out of the work as easily. An alternative method is to work with a set of interchangeable circulars, swapping the needle tips for the edge only. A third method uses two circular needles, one short and one long. Using different types or different colours of needles means they are less likely to be mixed up. Three needles are required for seamless garments.
Swatching will help determine the best solution for the project. As always, an individual knitter's technique and yarn choice has an impact in determining the best possible solution.
Parts 1, 3, 4 and 5 are here.
Part 1
Part 3
Part 4
Part 5


I never thought of using a smaller needle, but the slipped stitch edge seems a lot easier. Thanks!
ReplyDelete